
Cobbler the Quintessential Easy Dessert - 2 Ways
Or as some of my kids said when they were little, gobbler.
From the early spring berries to the fall apple harvest, the warm months of the year yield fruit, sometimes in abundance. Cobblers are a quick, easy, and delicious way to showcase these fruit delicacies, that won’t warm the kitchen up too much, or take too much time to prepare.
This will come as no surprise to my long time readers, but for anyone that’s new here; what’s coming isn’t a recipe per se, it’s more of a template for making cobbler your way, using what you have. Don’t worry! While not impossible, messing up cobbler is pretty difficult.
Way # 1
I think of this style of cobbler as Southern style. You can think of it however you’d like. This style uses a batter that’s poured into the bottom of your baking dish first, before you add your fruit. When it bakes, the batter surrounds all the fruit, like a delicious hug.
What you’ll need:
9” x 13” or equivalent baking dish
All purpose flour or your choice of substitute
Sugar, honey, or substitute of choice
Whole milk or equivalent
Butter or fat of choice
Fruit of choice
Salt
Baking Powder
Spices you like, cinnamon, nutmeg, etc.
Whisk
Mixing bowls
Measuring cups and spoons
Knife
Oven
Oven mitt or equivalent
How-To:
I like to start with the fruit. (My plum tree gave me dozens of amazing plums this year, more than enough for me to make two cobblers, and have plenty for eating out of hand. This is what you will see in my pictures.) You’ll need enough fruit to cover the bottom of the baking dish. If you aren’t sure how much that is, keep on adding fruit to the bottom of your baking dish until it is full. If you want more fruit to batter, add more fruit. Just don’t over fill the pan.
Depending on your fruit, you’ll need to peel and chop into bite size or maybe slightly larger pieces. Soft fruit like plums and peaches can be left in slices, since they break apart easily when cooked. Berries won’t need any chopping. I cut my plums into slices.
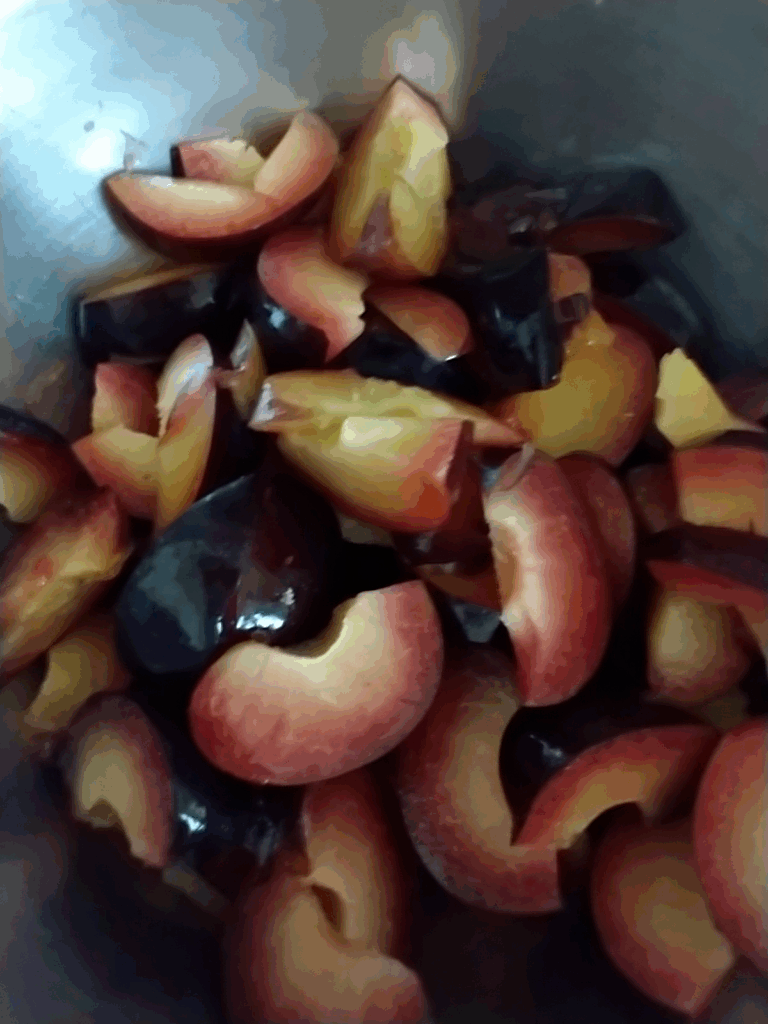
Sliced plums. Not sure what's going on with my picture, but it looks cool!
If you used the baking dish to measure out your fruit, take the fruit out and put in into a bowl.
Time to add your sweetener and spices to your fruit and mix to coat or cover your fruit. How much sweetener really depends on type of sweetener, how sweet your fruit is (You should taste it), and how sweet you like things. I like to use honey or raw evaporated cane sugar, often called rapadura or sucanat. This time I chose raw sugar. I used scant 3/4 cup of sugar. That let the plums sweet-tart nature still shine through. Add your choice of spices, I used ground cinnamon and a pinch of salt. Again, you will have to experiment and figure out how much spice you like. It’s always better to start with less than you think you should add, and work your way up. You can add, but not remove. Of course, if you don’t like spices, don’t add them. Once things taste the way you want, set this bowl aside.
Now is a good time to get your oven pre-heating, unless it’s slow, then do it before you start on the fruit. 350 degrees Fahrenheit, if you are using honey, or alternate flours, follow their instructions. You may need to lower your heat to prevent burning.
Make the cobbler batter. First, you’ll need to melt whatever fat you chose to use. I like to use a stick of butter, which is 8 tablespoons. If you’re using an alternate fat, follow their equivalency directions. Set the melted fat aside.
Into the mixing bowl, add your flour. I used an all purpose flour, about one cup. Again, follow the directions for using your substitutes. I added around 1 1/2 tablespoons of baking powder. I am at 5,000 feet in altitude, and this was plenty of leavening for me. You’ll need to adjust to what works at your altitude, and for your sweetener and flour choices. I added a generous pinch of salt, but if you’re using salted butter you won’t need any. I used about a cup of sugar. I always measure scantly with sweetener, so you may like a little more, but I wouldn’t go much over one cup, unless you balance the rest of the ingredients. Whisk the dry ingredients together.
Start with one cup of milk. I use a high fat whole milk. Pour this into the dry ingredients and whisk in. Add your melted fat, in my case butter. Whisk everything together and look at the consistency. It should be a thin batter consistency, like pancake batter. It should run off your whisk in a steady stream. If it’s too thick, add more milk or your substitute a tablespoon at a time, mixing after each addition. Once your batter is thin enough, stop.
Pour your batter into your baking dish. Make sure it covers the bottom.
Add your fruit and collected juices on top of your batter. There’s no need to make your fruit pretty, just evenly spread out.
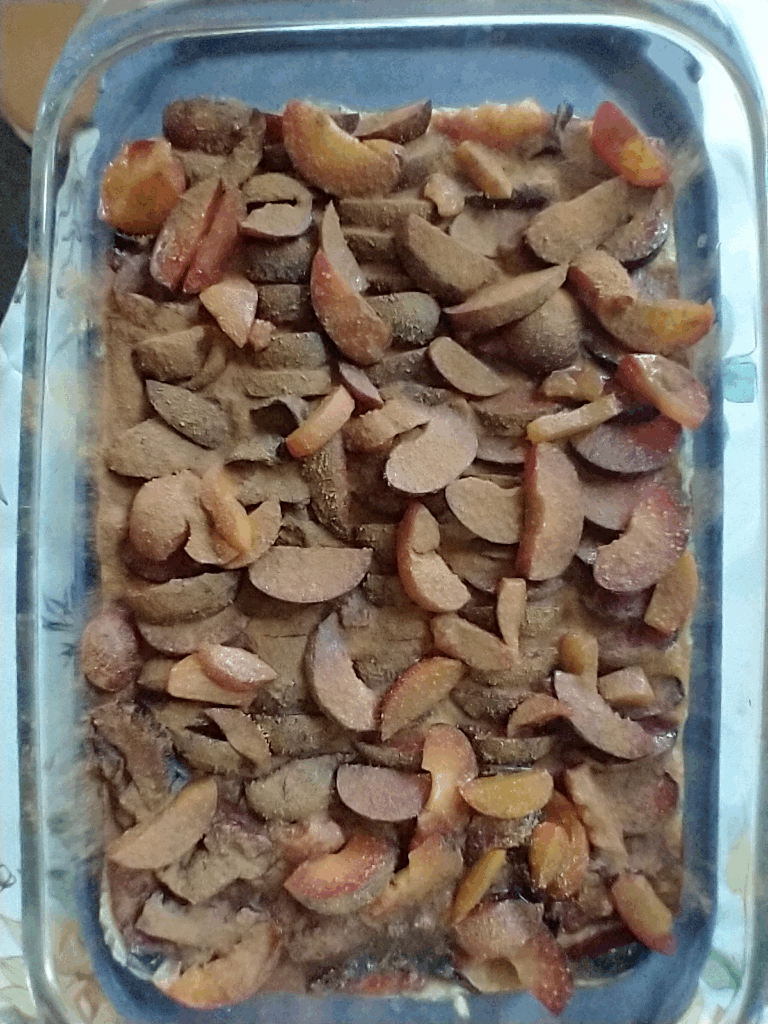
I forgot to toss the fruit with cinnamon, so I just added it on top!
Time to bake.
Once your oven has reached 350 degrees F, or what ever temp your substitutes direct, put your baking dish in your oven. I usually use the middle rack, but again follow the directions for your substitutes. Your time is going to vary based on fruit, oven temp, thickness of layers, sweeteners, flours, altitude, etc. I like to place a baking sheet on the rack below my baking dish, to catch any drips in case the cobbler starts to bubble over. You could also use a sheet of aluminum foil.
Bake for about 30 minutes.
Check your cobbler at this point. Your fruit should be cooked down, and the batter should be fully baked with no runny spots. If not, give it another 5 - 10 minutes and check again. Once your batter is completely baked, you’ll need to take your dish from the oven. My cobbler took about 50 minutes to get there.
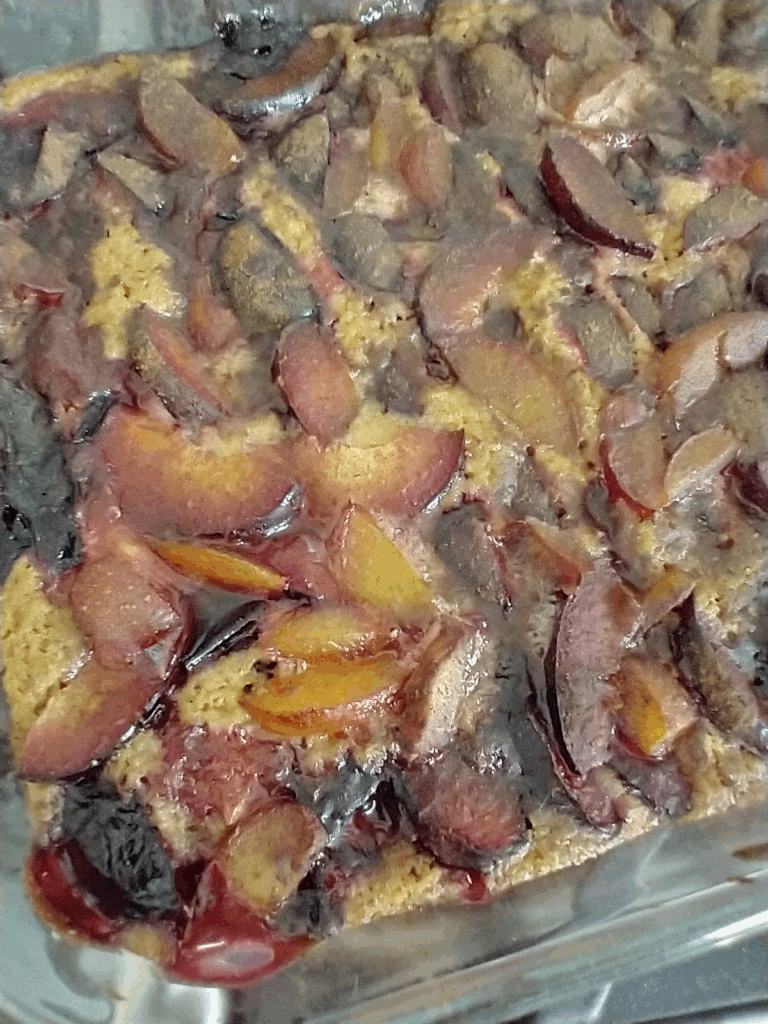
Fresh out of the oven!
Serve.
We don’t bother to let it cool any in our house. You need to use your own best judgement. We like a cold scoop of vanilla ice cream or cold heavy cream poured over top.
What’s good about this recipe?
Outside of being dead simple, the fruit and juices bake into the batter. You don’t have to worry about thickening the fruit. The batter is crispy and soft in different places. It’s warm, buttery, and delicious.
Way #2
I think of this style of cobbler as more Western style, since I grew up in the Western U.S. and it’s the more commonly made type of cobbler, at least in my experience. Again think of it how you want.
This is the fluffy, sweet biscuit topped style of cobbler. The fruit is on the bottom.
What you’ll need:
All purpose flour or substitute
Fruit
Baking powder
Sugar or sweetener of choice
Cream or Milk or substitute
Butter or fat of choice
Arrowroot, tapioca or more all purpose flour
Sugar or substitute
Spices
Salt
Baking dish or cast iron skillet
Oven
Mixing bowls
Spoon
Measuring cups and spoons
Knife
Oven, oven mitts
How-To:
Although just as easy to make, this recipe has a few key differences. The fruit will be on the bottom of the baking dish, and the biscuit topping is placed over the top.
Just like above, let’s start with the fruit. Oh, and pre-heat your oven to 350 degrees Fahrenheit.
Same deal as above, you’ll need enough fruit to cover the bottom of your baking pan. For my example, I chose a cast iron skillet. (The whole point is to use what you have available.) Once you have your fruit chopped and measured, put it in a mixing bowl. Add your sweetener and spices as method #1 above. This time you will need to add a thickener to your fruit. There are a lot of choices, so use the one you like. I used tapioca flour/starch. Probably 3 tablespoons worth. It’s fine if your fruit is a little runny, or a little thick, it’s just cobbler. Mix the sugar, spices, and thickener with the fruit until everything is coated. Pour your fruit into your baking dish. Dot the fruit with a few tablespoons of butter or fat of choice.
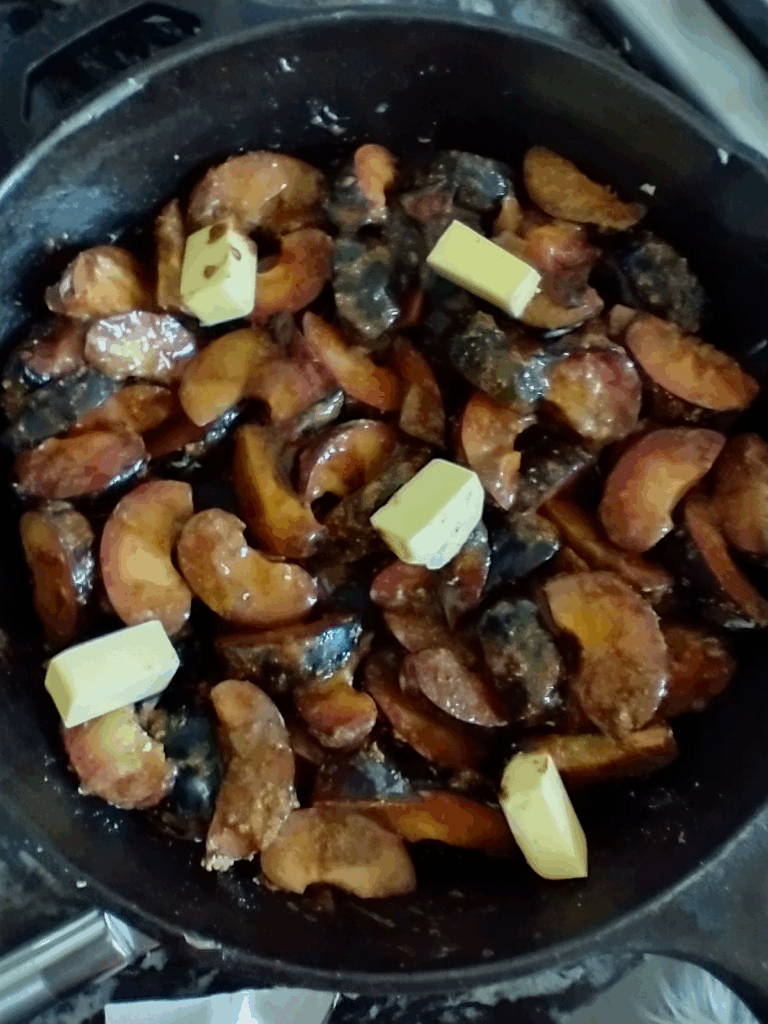
Dotted with some chunks of butter.
Make the biscuit topping. If you already have a favorite biscuit recipe, use it. Add a little sugar so it becomes a sweet biscuit, I suggest 3 - 4 tablespoons. Really any standard biscuit recipe will work here. Even a scone recipe would work.
I have my own recipe, which isn’t really a recipe. You’re welcome to try it to see if it works for you. Please be aware I don’t really measure things out anymore, I just go by feel.
2 cups all purpose flour
1 cup heavy cream. If using milk instead, melt 3 - 4 tablespoons of butter to add.
Heaping tablespoon baking powder
1/2 teaspoon salt
3-4 tablespoons sugar
Mix, dump out onto floured board, knead gently. Fold and press a few times to build layers. Press out and cut.
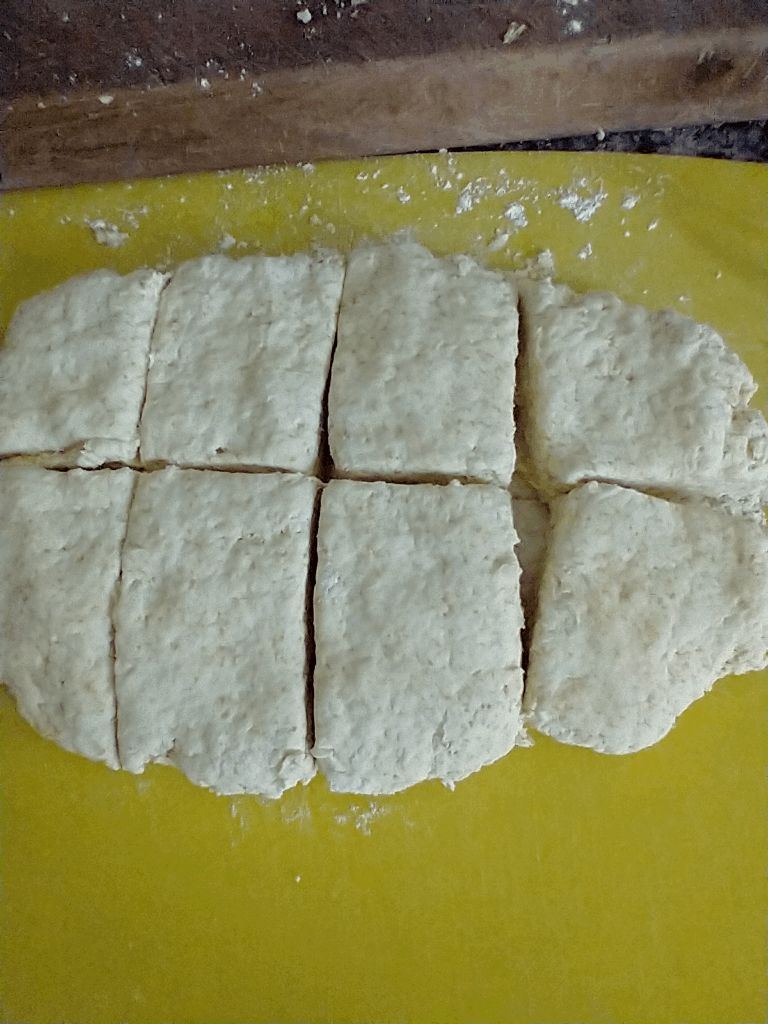
I just cut my biscuits into squares.
You can make your biscuits drop style, or roll out style. I chose roll out. Drop the dough evenly over top of your fruit. You should have gaps. Remember the biscuits will rise and spread and cover the fruit. Also the fruit peeking through the gaps is pretty!
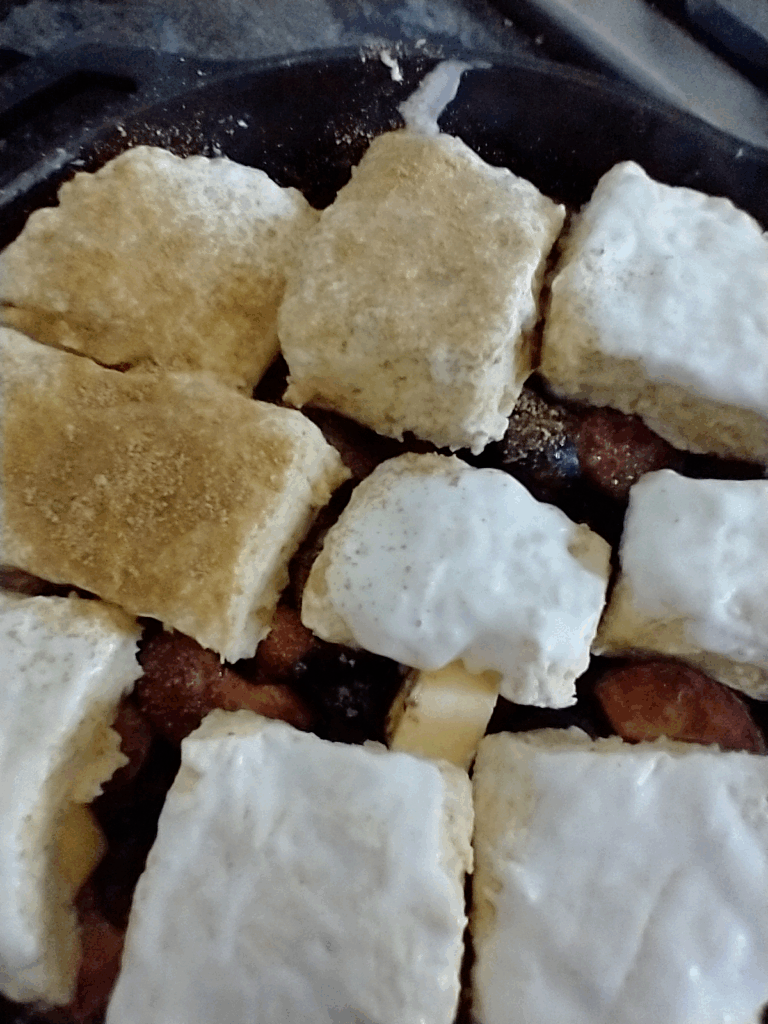
The biscuits are brushed with cream and sprinkled with sugar.
Optional step:
Brush the tops of your biscuits with cream or milk and sprinkle a little sugar over them to make a pretty and crunchy top.
Put the cobbler in the oven.
Just like above, bake this for about 30 minutes, give or take. Again, I like to have something underneath to catch anything that might spill over. It’s done when your biscuits are baked all the way through.
Serve and enjoy! The ice cream or cream is also delicious here.
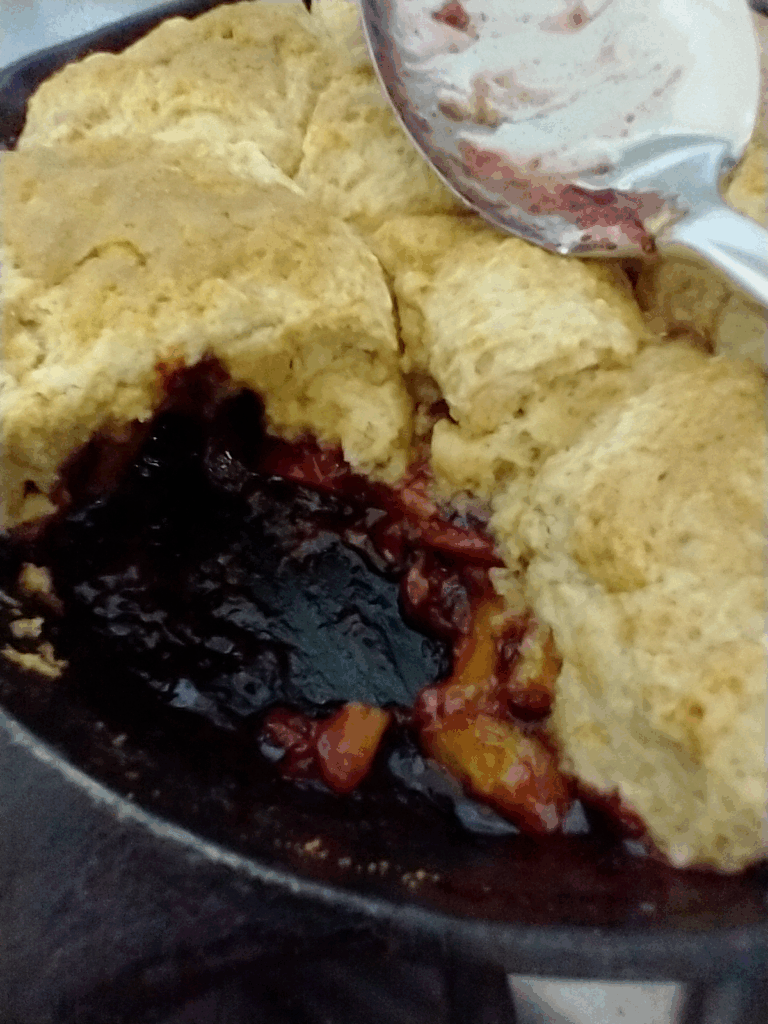
Western style, fresh from the oven.
Cobbler is such an easy and forgiving dish to make. You can make it from frozen fruit, or preserved fruit in the winter if you have the hankering. You can take the same principles, remove the fruit and sugar and make a savory meal with meat and veggies. Nourishing meals and treats made at home, with what you have are better than anything else. This is real food for real people. Nothing better than that!
Let me know if you make a cobbler! What is your favorite type? How do you like to serve it?
Thanks for being here, beautiful soul! See you soon!


Copyright© 2026 What Don't I Do. All rights reserved.
Disclaimer: As a systeme.io affiliate, I earn a commission if you purchase a product through my link, at no additional cost to you.