
Bacon is Expensive! Make Your Own With My Simple Method.
National Pig Day is on March 1. I happen to love that Pig Day is a thing, and that it also falls on my birthday! So in honor of both, I'm sharing one of my favorite DIY's and one of my favorite ways to enjoy pork!
Before we dive in to the how-to, I want to share why I got started making my own bacon. I also have a personal story for you, bacon related naturally.
Why I Started Making Bacon
It’s not easy for me to boil down to a simple statement the many paths that led me here. It’s kind of like a pebble rolling down a mountainside, that bumps into another pebble, and another, until many pebbles are rolling down together and start dislodging bigger and bigger pieces of the mountainside, until it becomes an avalanche. Once the avalanche is finished, the face of the mountain is changed, something new is revealed.
For me, the avalanche removed a lot of negative things in my life and in my way of thinking. The new mountain side held underlying truths. So I started climbing, discovering what was buried and hidden by the debris that existed before. One of the paths I found, and keep returning to, is making things the way I want them to be. I no longer held to the idea that someone else should make my life easier, or do it for me. I allowed the boulder of an idea that I needed to be an expert before I tried something to smash into the earth below.
I digress. Simply put: I didn’t like the ingredients in the bacon available. Nor did I like the price tag for bacon that was more acceptable ingredient wise, but still felt like a compromise. My reasons for not liking the ingredients are a part of that avalanche and journey up the mountain. So I did what you have come to expect from me. I got busy researching, learning, trying, and refining. I made a lot of batches of bacon, each better than the last, until I landed on my favorite method and recipe. Ironically, it is the simplest recipe and method.
I started with this recipe, from Primal Palate.
Let’s Make Some Bacon!
Heads Up!
The pork belly needs at least 3 days to an entire week to cure, before it is ready to be smoked or oven finished. Please plan for this before you start the curing process!
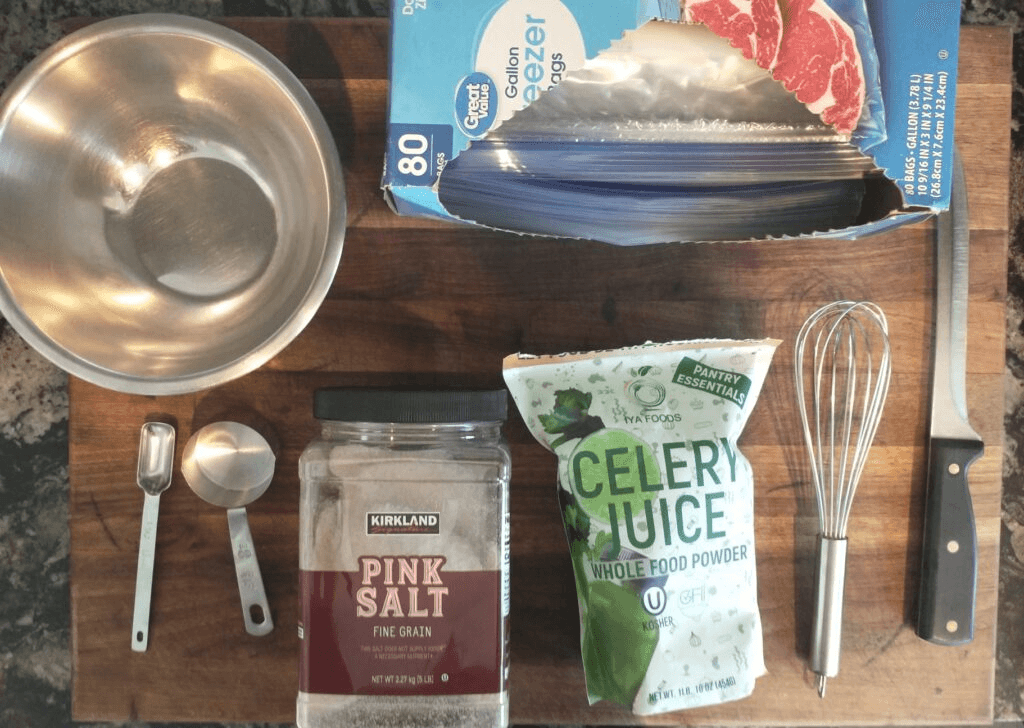
Supplies:
Pork Belly, up to 15 lbs. You can get these at grocery stores, restaurant supply, and bulk stores like Costco or Sam’s Club.
Salt. A good quality, real salt, not table salt. I like pink Himalayan, but you can also use Redmond’s Real Salt, or a Celtic sea salt. You’ll need 3/4 of a cup for this recipe.
Celery Juice Powder. This is a very specific item. It is not celery seeds, or celery salt. Celery juice contains a high amount of naturally occurring nitrates. It is often used in ‘nitrate free’ bacon and other products. Here is one from Amazon: https://a.co/d/2PuIUsV. I do not have an affiliate with Amazon. This is just one that I have used. You will need 6 teaspoons for the recipe.
Ziploc bags, or something you can cure the bacon in, like a tightly sealed glass container.
Bowl, knife, 1/4 cup measure, 1 teaspoon measure, whisk, paper towels, small seal-able container for any leftover cure, sharpie or something to mark the date.
A refrigerator.
The Cure:
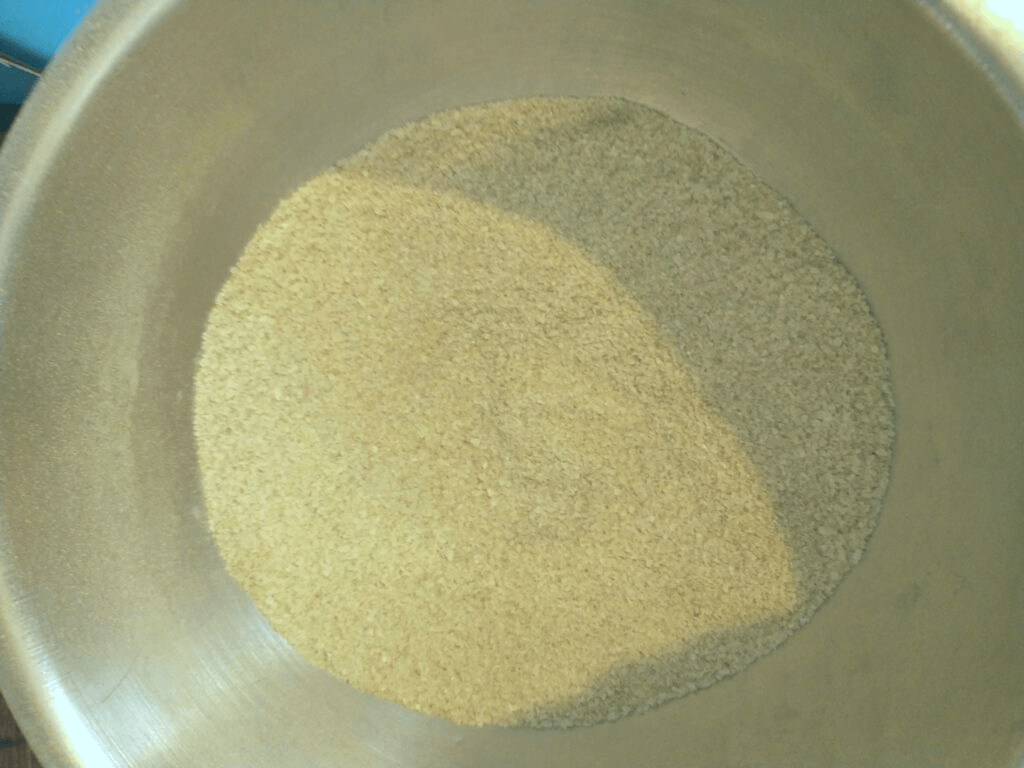
The first thing you are going do is make the cure, the mixture that is going to help preserve and flavor our pork belly. For this you will need the bowl, measuring cup and spoon, whisk, salt and celery juice powder. Notice there are only 2 ingredients for the cure, salt and celery juice powder. That is all that is needed to cure your bacon.
In your bowl mix 3/4 cup of salt with 6 teaspoons of celery juice powder. Whisk until blended. Be aware: celery juice powder makes a bit of a cloud while you are measuring and mixing it. When done, it should look something like the picture above.
Set the cure aside for now. We’ve got to deal with the pork belly next.
Prepping the Pork Belly:
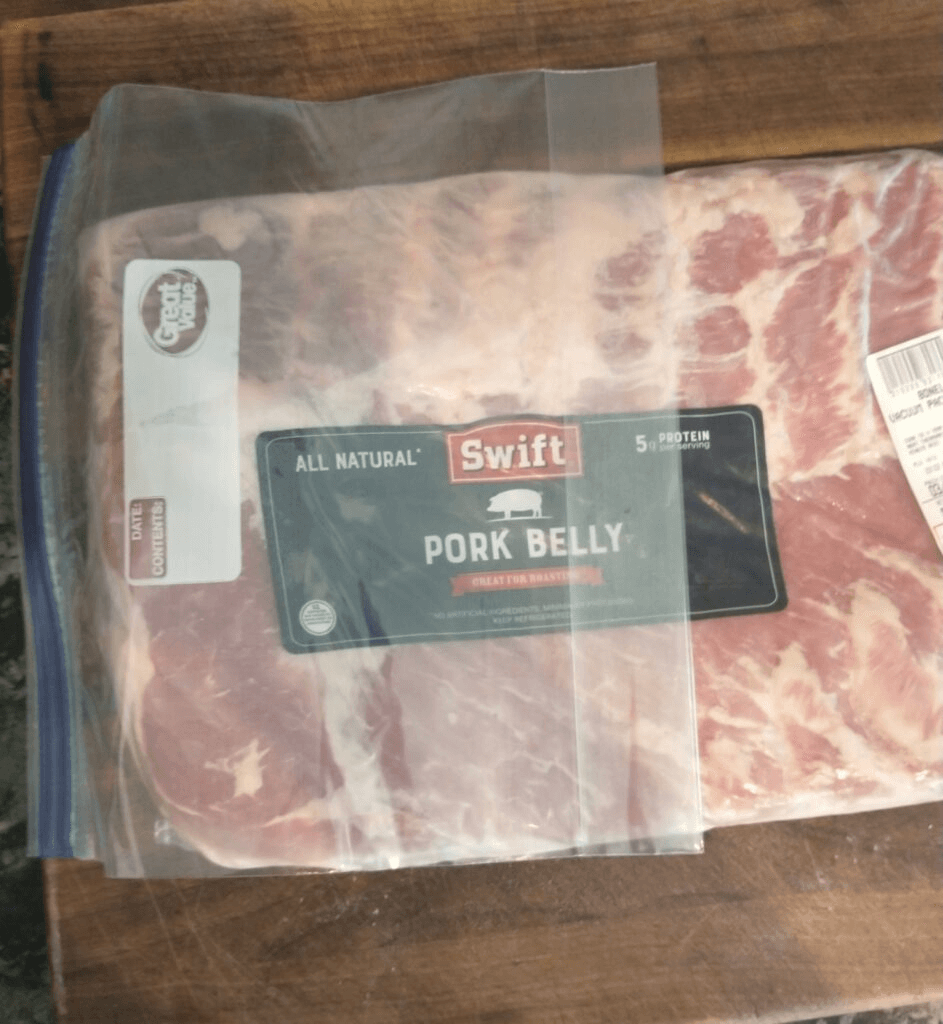
Before taking the pork belly out of the package, make sure to measure it, so that it fits the container(s) you are using. I like to use zip top bags. So I lay a bag over the pork belly, and make a mark with my knife where I want to cut.
Once you have your marks made, take the pork out of the bag and cut it to size. (Make sure you have a clean and sanitary area to work on.) Then blot any liquid from all pieces with some paper towels.
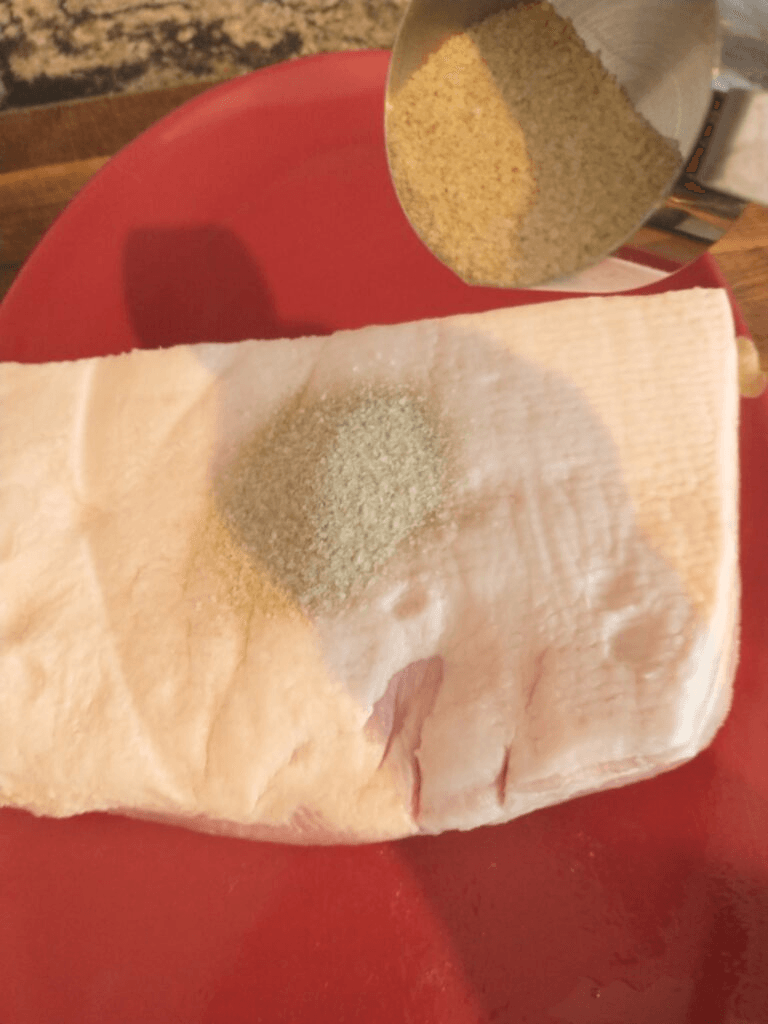
Applying the Cure:
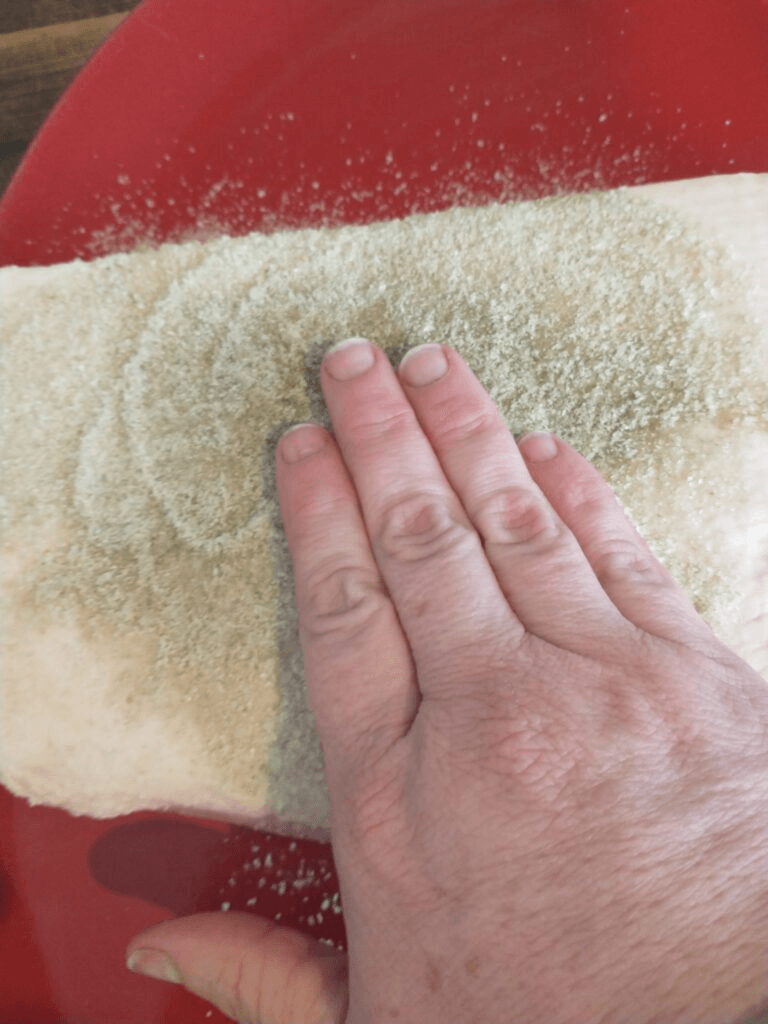
I like to put the pork belly on a platter while I do this. That way the mess is contained a little better. And this step is messy! I like to use the measuring cup from earlier again to measure out small portions of the rub onto the pork belly. It helps keep the cure dry and uncontaminated.
Take one of your pieces of pork belly, or if you didn’t need to cut it down, the whole pork belly, and pour out some of the cure on one side. Rub the cure all over that side of the pork belly, making sure it is completely coated.
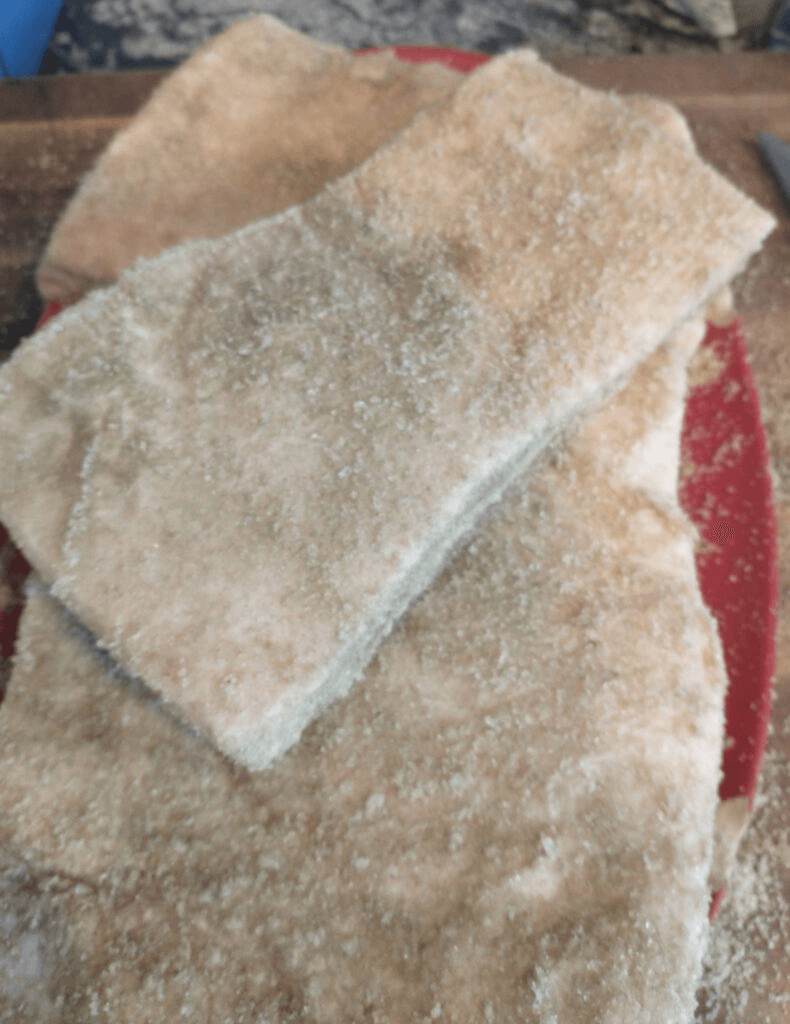
Repeat this process for all sides of the pork belly, including any cuts either in the meat or that you made. Repeat this process for all remaining pieces of pork belly.
3,2,1... Let’s Cure!
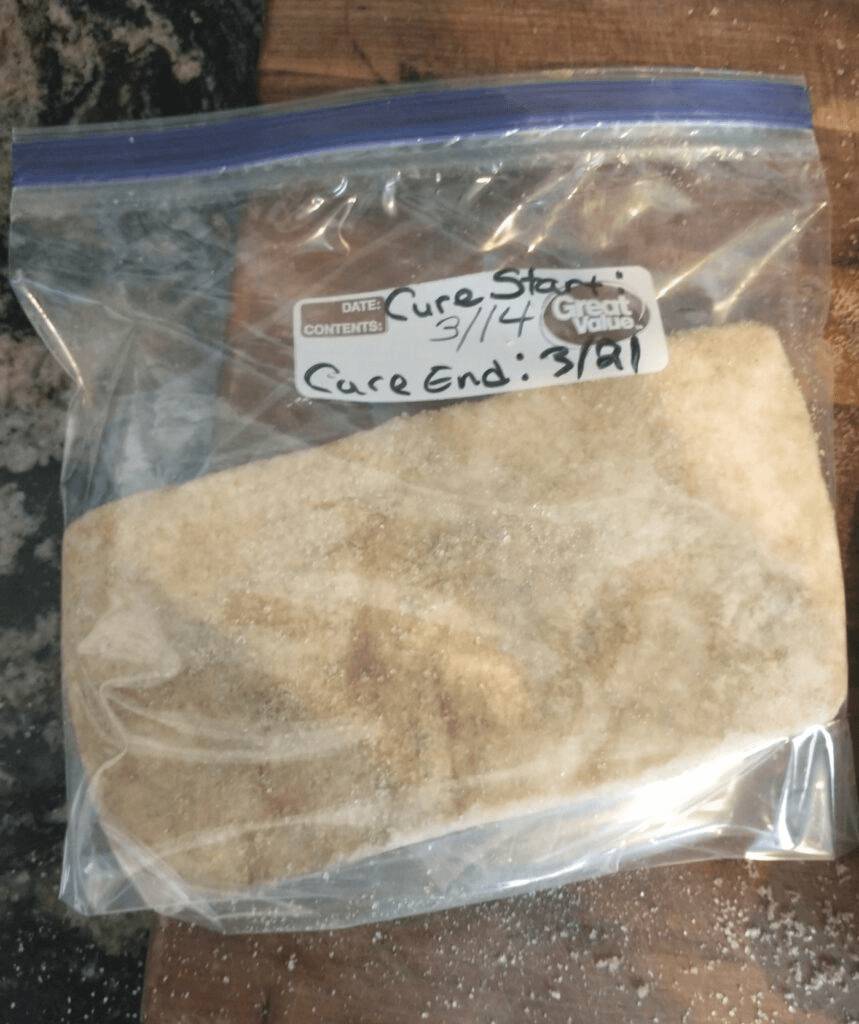
Now it is time for you to put your almost bacon in whatever container you are using. I recommend marking the outside with the date you started the cure and with the date the cure will be finished, which is one week from your start date. I strongly suggest marking your calendar and setting up a reminder for yourself with the date the curing will be done so you do not forget about it and wind up with a science experiment in the back of your refrigerator!
All that is left for you to do is put your bacon in the refrigerator for a week to chill out. If you have any left over cure that has not been contaminated with any pork juice or dirty hands, you can save it in a sealed container for your next batch of bacon. I like to reuse empty spice jars.
The Wait is Over! Now What?
We are down to the last few steps before you have your very own, homemade, succulent bacon! Once your bacon has completed the week curing, you need to pull it out of the fridge and give it a rinse. Try to get off as much of the cure as you can by rubbing the bacon with your hands under clean running water. I prefer to run cool water for this. Don’t sweat it if you can’t get all of it off, everything will turn out fine. Pat your bacon dry with some paper towels, and get ready for the next to last step.
Applying Heat
To finish the curing process for your bacon, it needs to be heated up for a bit. I have done this two ways: in the oven and in the smoker. Now for obvious reasons the smoker is my favorite method, but the oven will produce a satisfactory product, although it will lack some of the iconic smokiness of American bacon.
To Oven Cure:
Preheat your oven to 200 degrees Fahrenheit. Place your pieces of bacon in a pan with sides to contain any juices that may drip. Heat the bacon in the over for 90 minutes. Remove from heat, allow to cool, and then refrigerate in a clean container over night before using. The refrigeration is important before you cut your slices of bacon. The meat will be too soft to get nice slices if you don’t allow it to rest and firm up.
To Cure with a Smoker:
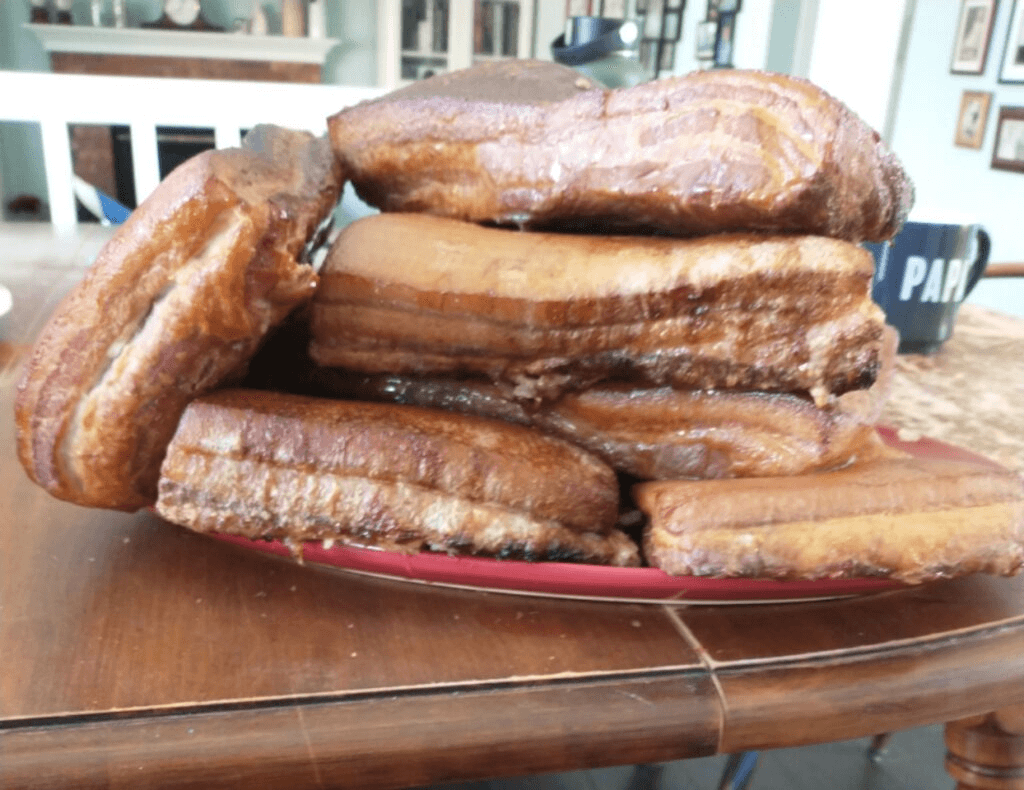
Preheat your smoker to between 200 to 220 degrees Fahrenheit. Use any wood you like the taste of. I like to experiment, but hickory is always a solid choice, as is apple wood. Smoke your bacon for 2 hours. Remove, allow to cool, and refrigerate over night before slicing.
Here’s what it looks like after being smoked:
What to Do With all that Bacon?
Eat it, of course!
I usually vacuum seal the bacon portions and freeze them until I need them. You can certainly slice it all up and freeze it that way. Bonus points if you have a slicer! I cut mine all by hand. Bacon will not keep in the refrigerator forever, so you will need to freeze it. Unless you plan on eating it all with about a week, maybe two.
But HOW do I cut bacon?
With a knife, duh!
Take a look at your bacon slab. Try to find the side that looks most like a slice of bacon, with strips of meat and fat. Line your knife up along that side and cut a strip. It will take practice to get those near perfect slices, but that is OK. Wonky cut bacon is still delicious bacon. The nice thing about having your own bacon is that you can cut it any way you want to. Like bacon bits? Like thick cut, double thick, or thin? Boom! Done.
Final Thoughts:
I hope you enjoy this DIY! It has saved my family so much money, and allowed me to feel better about the ingredients that are being used. You can really experiment with flavors and find just the right combination for your own family. Thanks for being here!


Copyright© 2026 What Don't I Do. All rights reserved.
Disclaimer: As a systeme.io affiliate, I earn a commission if you purchase a product through my link, at no additional cost to you.